 by
by Background
In this digital era, having control of your digital assets such as photos and documents is very important, and it will be crucial to find the ideal solution to store these for future access and reference. We do face issues related to these storages from time to time due to hardware failure, lost password, etc.
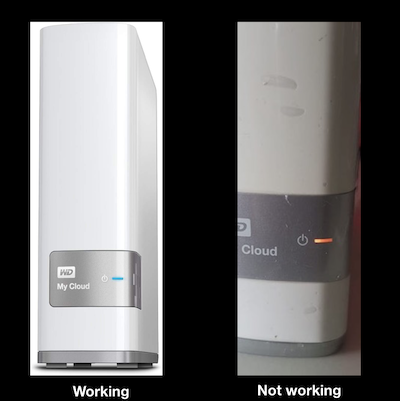
Recently, I faced the issue with the WD My Cloud 4TB disk storage used for storing documents and family photos. A couple of years ago, the firmware update failed, and the system became non-responsive, and an amber light started displaying instead of the usual blue light.
Western Digital offers a year warranty and promises to repair the storage if any failure happens in the warranty period. However, you need to take the backup before giving the drive for service. This offer leads to two problems as below.
- If the drive is not working, there is no way you can access and take backup.
- In some cases, the system will be working intermittently, and you can take backup. However, if you don’t have a similar capacity storage drive, the process of taking backup becomes cumbersome, especially if you already used up a good portion of the storage.
Once the warranty period is over, Western Digital abandons the product and point to third party vendors as they don’t have any service team! They don’t show any liability towards recovering your data at any point, including the warranty period. Third-party data recovery vendors on Western Digital website charge thousands of dollars for data recovery services. However, full data recovery is not guaranteed. There are also some vendors available online who charge $30-50 to test and give a preliminary report. One such vendor wanted me to send the storage device to them by courier. I did not want to send the storage device to an unknown address without seeing the person face to face. After failing to find a reliable and economic external solution, I decided to explore the data recovery by myself and started searching for information on it. Finally, I managed to find bits and pieces of information online and could completely copy the data from the storage to another USB Drive. Luckily for me, only 1.5 TB was used up, and I did have another drive with a higher capacity to copy the data. Ironically, another WD USB Drive! You can follow the steps described below to attempt to recover the data if you own a non-responsive WD My Cloud. The cost incurred to recover the data was below $15. The data recovery will be successful if the issue is from firmware update and not due to physical damage to hard disk.
Opening the enclosure
The motherboard and Hard Disk is fixed inside the white enclosure using a clip lock. You can open this lock using a credit card or any object of that thickness. Pushing the card with force might break the lock. However, if you are not planning to use the enclosure later, it should be fine.

Refer to the video below showing how a credit card is used to unlock the enclosure.
Taking out HDD and detaching motherboard
Once unlocked the enclosure, you can easily push the HDD and motherboard together, as shown in the video here.
After that, you can unscrew the motherboard and detach it from HDD, as shown here.
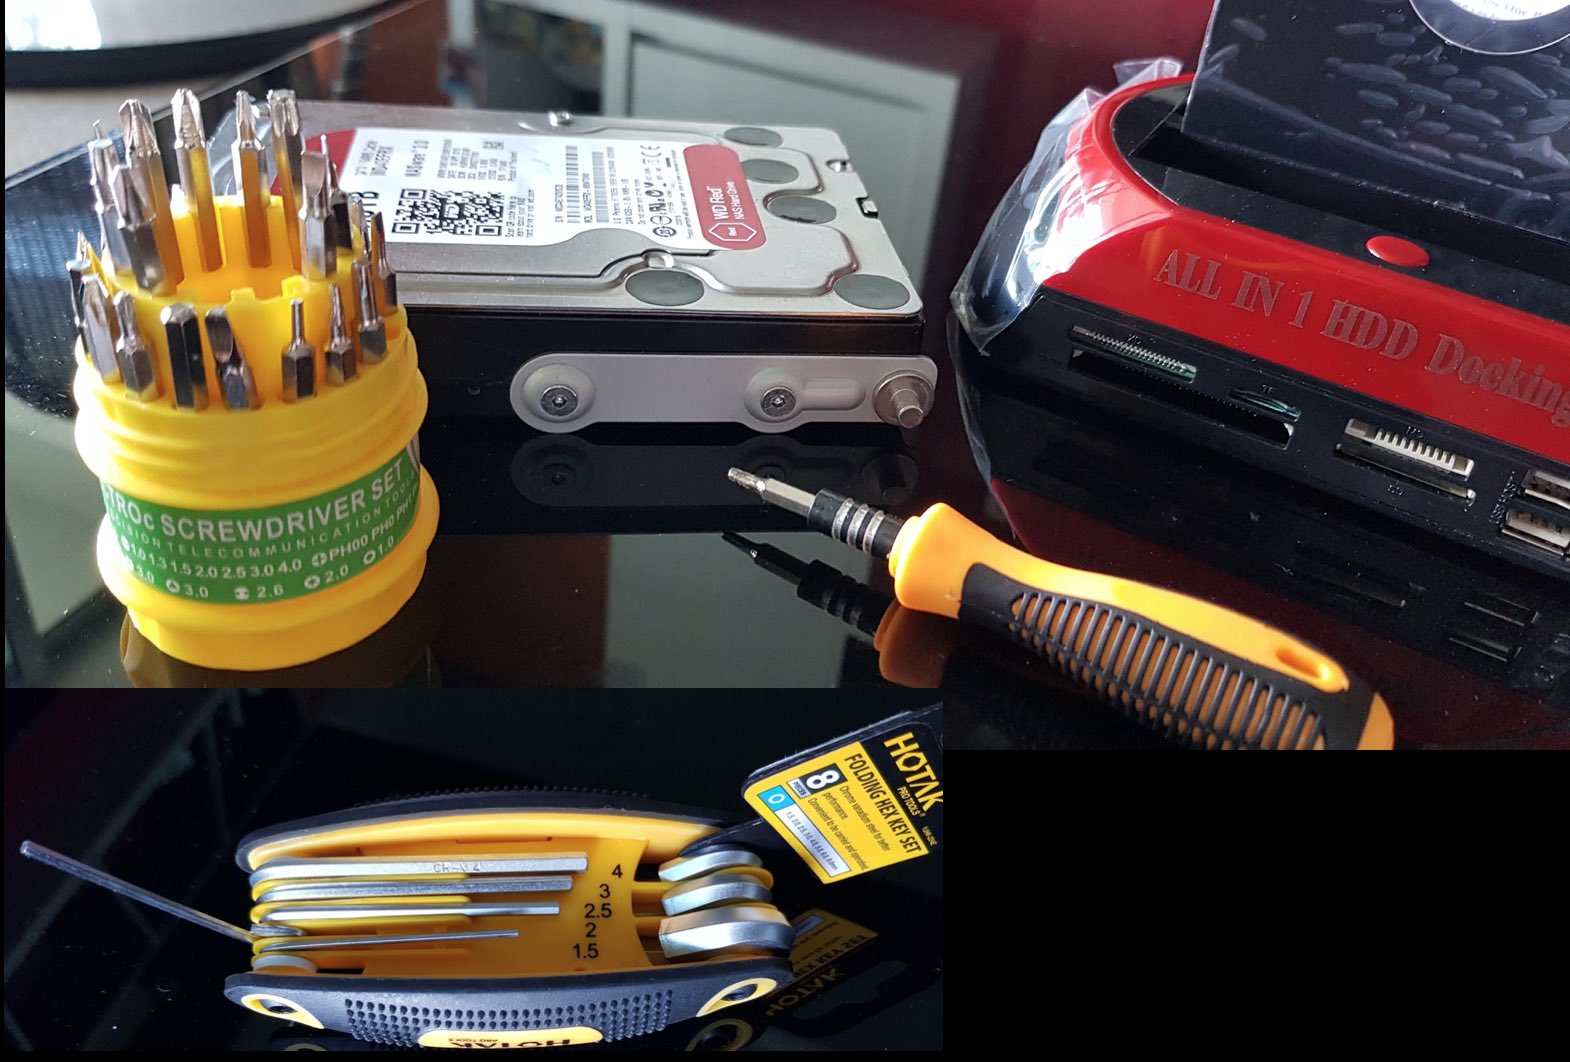
Need to use a Phillips type screw driver1 for this. If you don’t have one, please purchase an economical set from Amazon for $6-7 or buy one set from a local hardware shop which will be useful to unscrew other screws mentioned later in the post.
I noticed I spoiled a plastic clip while dismantling the HDD from its case. It should not matter unless you somehow repair the My Cloud device by updating firmware and is able to reuse it. I don’t see much hope in most cases. Once the HDD is taken out, we can connect it to a computer for data copy.
Connecting the hard disk to the computer
I bought the connector cable system online for around $15, as I didn’t want to spend more money for an HDD case till I know if I can transfer the data successfully.
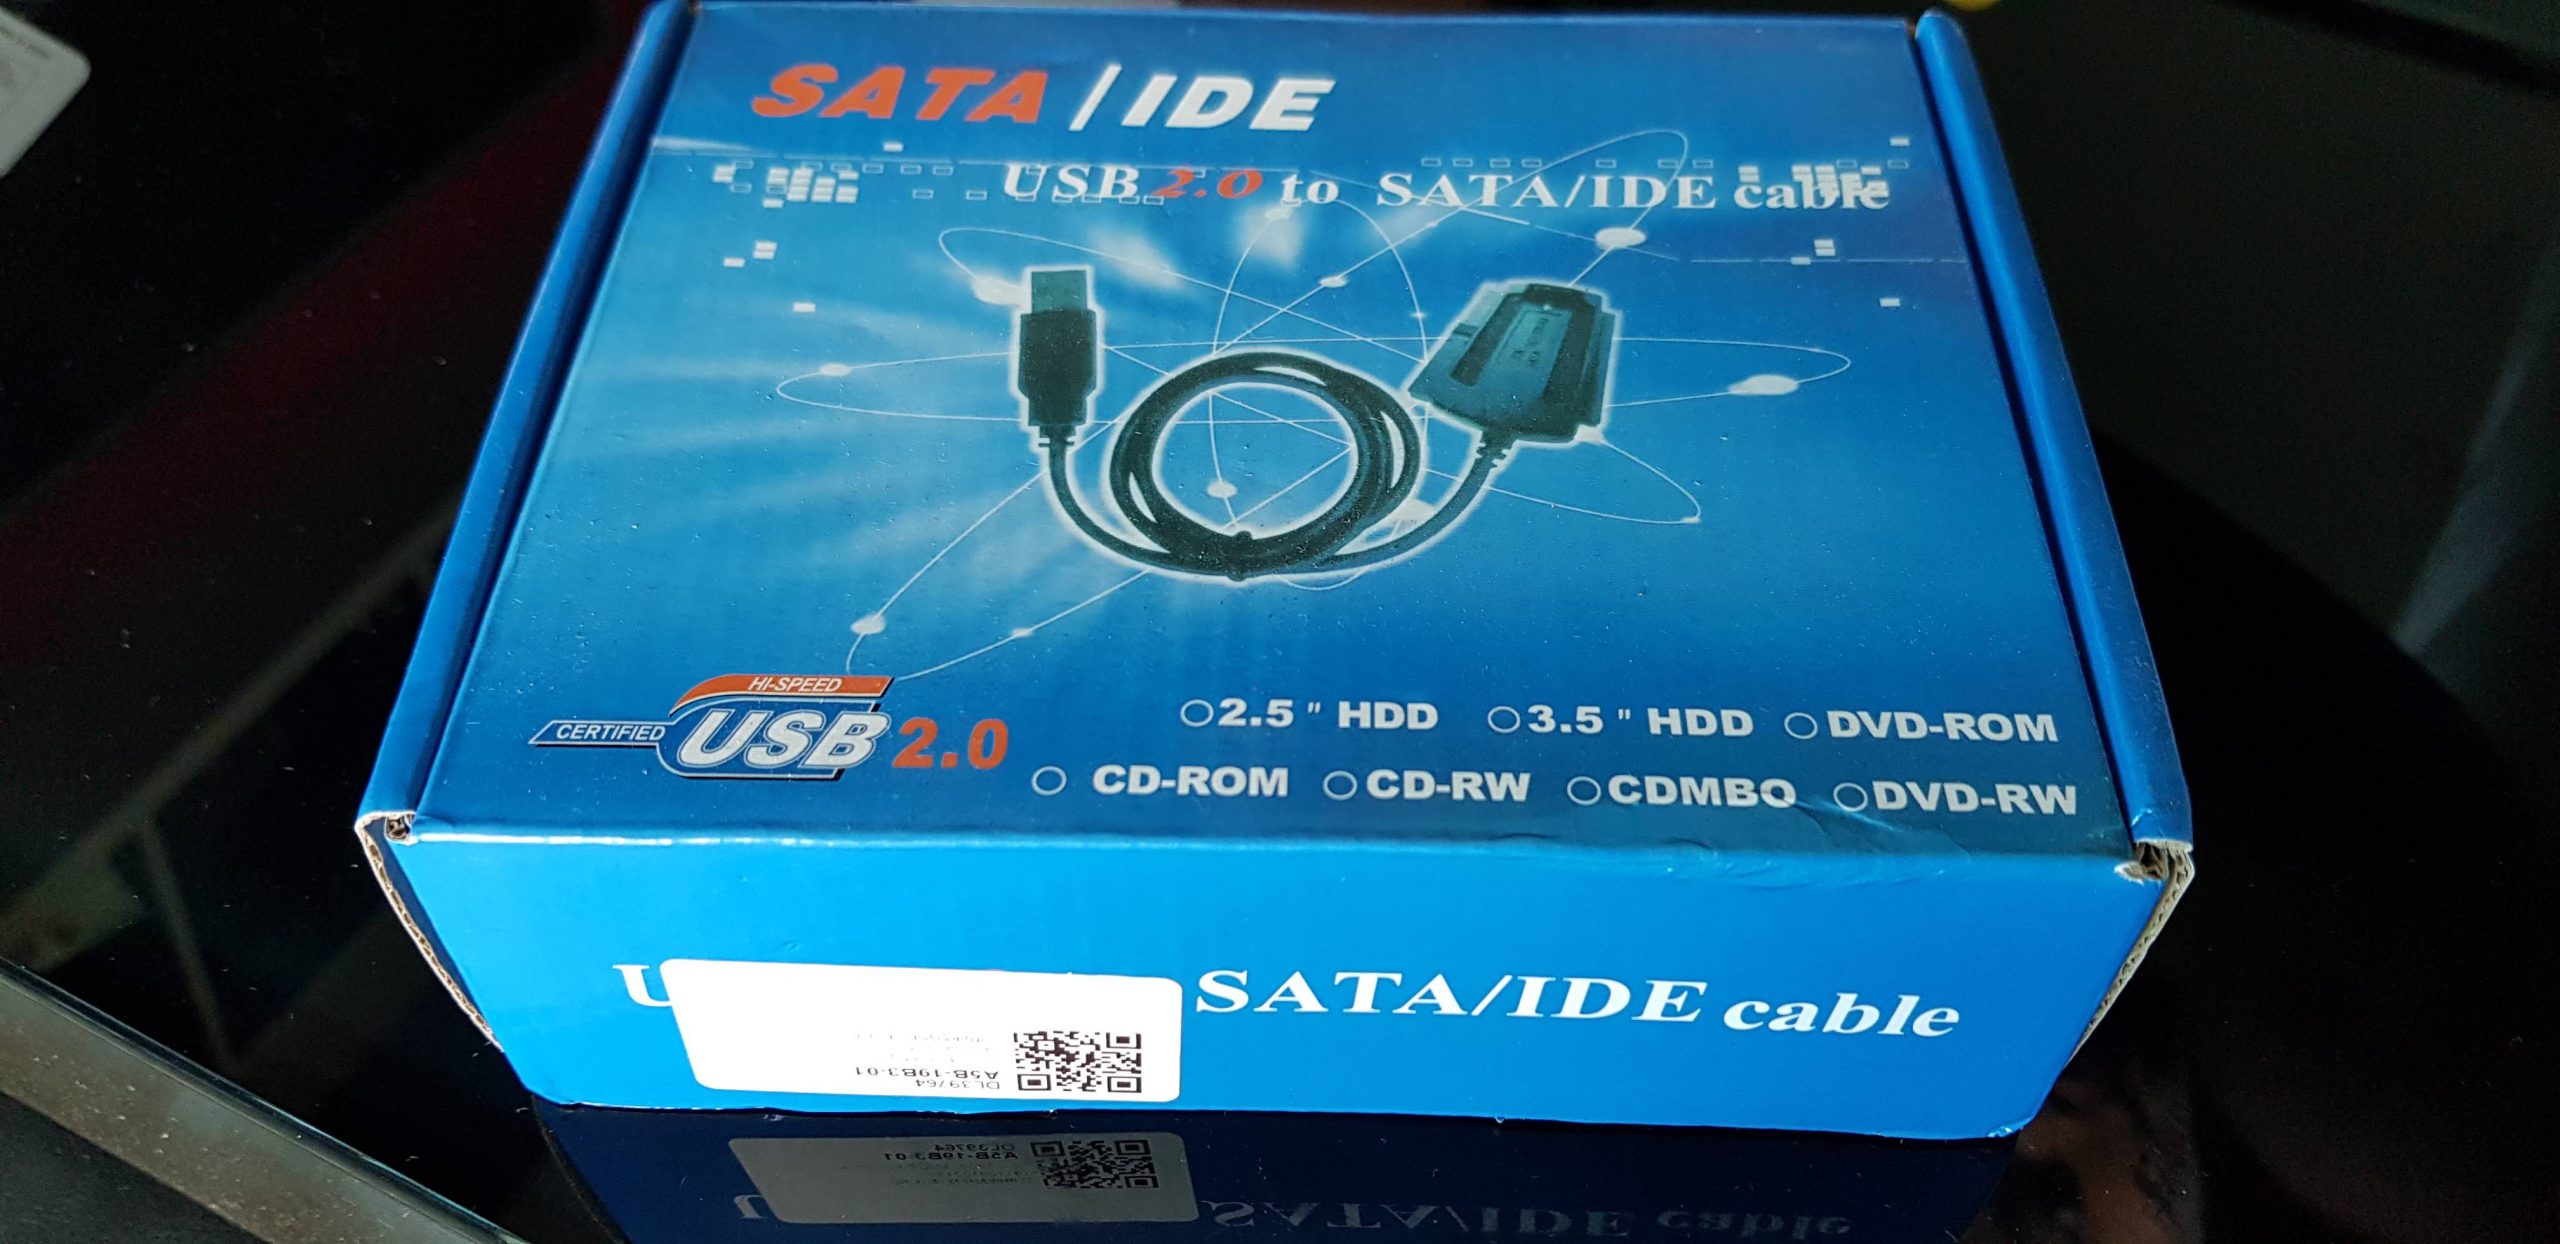
There are multiple HDD cases available for around $25, but I was not sure if I can fit the HDD into those. I felt a simple cable is better as I could see the ports and connection options available, and it seemed an easy task to connect to HDD.
The basic connector has a power supply system and data transfer cables. The cables are connected, as shown in the video below.
Copying data from HDD
The data in WD My Cloud uses the Linux file system and is not readable directly on macOS or Windows. You can use a third-party software extFS from Paragon software to read this file. Please note that they have a ten days trial period for the software, and that is good enough for you to take a backup of the HDD. After ten days there is an annual fee of around USD 40. As the copying can be done in a day, you should be able to save this. You might be able to extend the license for another five days by sharing their application link on Facebook.
Once you download the software, you will be able to view the files. For macOS, I have to give permission to access the drive and mount the hard disk. Once you see the data, start copying it to your backup disk.
Please note that the cable system you buy for around $15 might be unreliable for longer-term use and hence plan to complete the data transfer in a day or two. In my case, the power supply had a spark and stopped working after a couple of weeks. Luckily my files were already copied by then.
Using HDD cases
As the files are now secure and copied and I thought of using the HDD for temporary purposes. I felt an HDD case would be appropriate if I have to use this as an external disk. Hence I ordered an HDD Docking station for about $20.
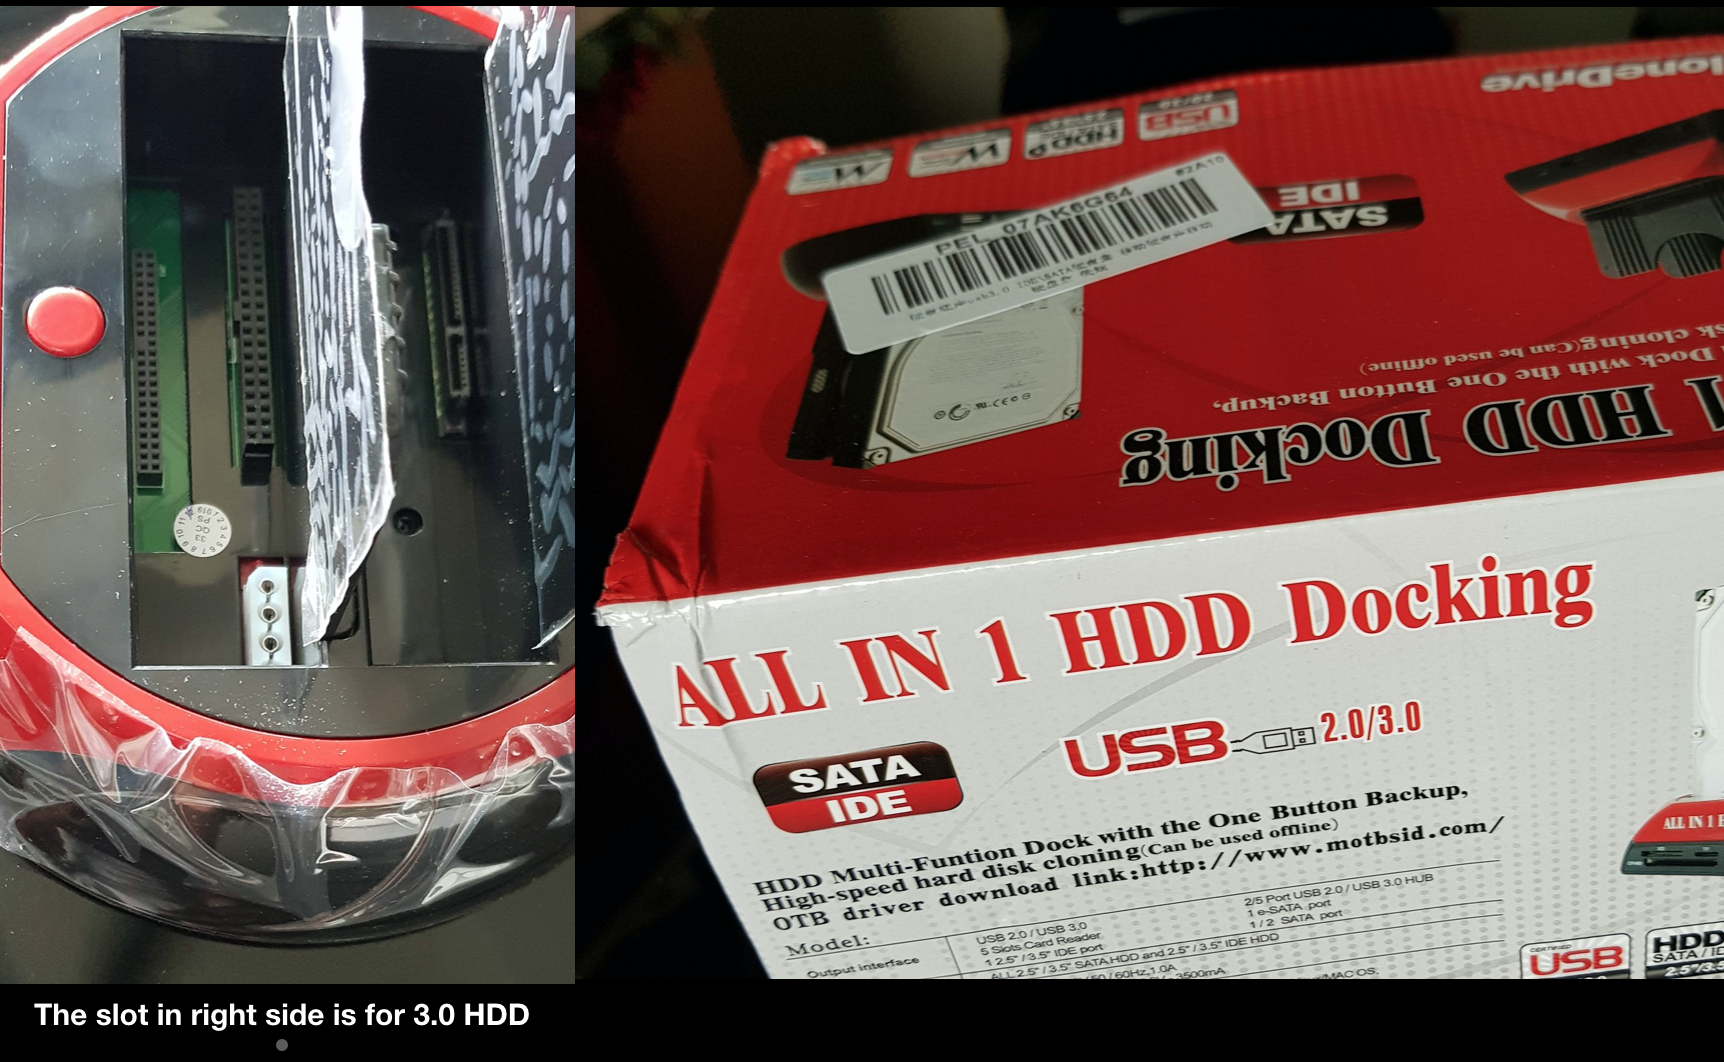
Unfortunately, I could not use the case as I suspected earlier. I could not remove the metal strap attached as the screw was very tight. Hence, please be aware that you will have a struggle if you are planning to use similar external cases.
I did purchase a new set of tools for this purpose. However, I could not remove the metal strap and hence could not insert the HDD into the slot in the HDD case.
Hopefully, I can take the HDD to an expert to get the metal strap removed and use it with the HDD docking station. Let me know how did you manage to recover the data in the comments below.
Hi Syam,
I face the same issue as you. However, when my HDD was in an enclosure, I tried reading it using Ubuntu on my Raspi 3 and the HDD was not detected. What should I do?
Hi Leon,
I am not an expert in Linux and hence decided not to go that route. Please see if you can use Paragon software which has 7 days free trial version. All the best.
Hi Syam, bravo for this post! A power outage took out our WD My Cloud with 50+ years of work and family photos and documents on it, and your instructions saved the day. With our particular model, opening the case required slipping the card around all four sides, prying open tight clips and slots all the way around. After that, every step worked as described. The drive will be repurposed to hold backups of the new server drive. Lesson learned…
Thanks, Michael the note. Glad it was useful.
I have downloaded the program from Paragorn. However I cannot locate my files. Any ideas regarding the location saved??
Hi Nikolas, I was using a Macbook and I could see the disk drive in the Finder window and could copy to a folder in my local disk.
Hi, I have managed to remove the screws from the metal bracket. You need to saw it first so that a normal screwdriver can be used to remove them. I have some pics to share if you want.
Thanks, Jeffery Tan, That’s good to know. Sent you an email. Please email the pic there. Thanks for the help.
Hello Syam, Great work. I have attempted to do as you have by connecting an adaptor and using a third party software to recover deleted files using a windows 10 system. I’m not familiar with Python, Linix, etc. Is there a way to use the software you linked in your post on a windows 19 system?
Hi Barry,
I did the recovery on a Mac and hence not very familiar with Windows OS. Good luck.
Hello Syam . If I buy only the “HDD Docking station” ,I still need the to use “connector cable system” as showed for you ? thank you .
Hello Rogerio,
If you are lucky and able to unscrew the HDD completely you will be able to use the HDD docking station and do the transfer. In my case, unfortunately, I could not remove the metal strap as explained above and hence I could not insert the HDD in the docking station. The cable system was cheaper and it worked for me. All the best for your attempt.
Hi Syam! This is of great help. Could you please drop the link to buy the connector.
Hi Anuj,
Please use this link to buy from amazon https://amzn.to/3eScjvz
I bought it from this link when it was a bit cheaper https://amzn.to/2Vdh7CV