 by
by As Python is becoming more popular, more and more web applications are getting developed using Python. We can use the Flask framework for deploying web applications developed in Python. This article explains a step-by-step process to deploy Flask App on AWS. I tried my best to include the background information and the necessary commands to complete the task to help beginner-level AWS and Flask users.
Tools used for deploying Flask App
We need to install the following tools to deploying Python Web application using Flask framework on AWS.
- Flask microframework – A web framework to help web development using Python. Flask and Django are two very popular Python web frameworks. Flask is lightweight and easier to use for beginners compared to Django.
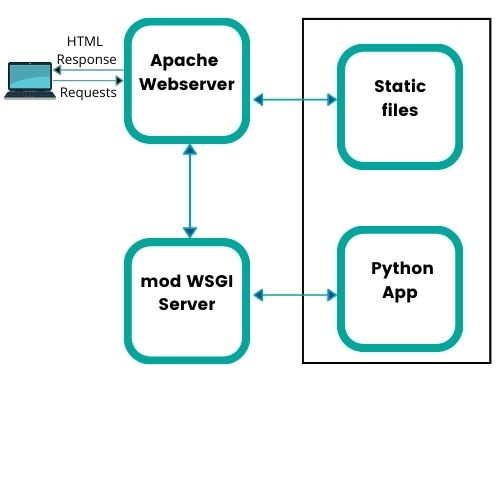
- Apache is a popular webserver. Webserver accepts incoming requests from users and sends back HTML files. Nginx is another popular Webserver software. We will be using Apache.
- modwsgi is one of the interface software for hosting Python application. There are various other software interfaces such as CGI, which serve a similar purpose.
Creating the AWS EC2 instance
A. Select EC2 from services and launch instance. You can select Ubuntu Linux server version 18 (released in 2018) or 20 (released in 2020). An important difference between these versions is the default python version. The default python version is 3 in Ubuntu server 20, whereas Ubuntu server 18 has Python version 2. Let us select “Ubuntu Server 20.04 LTS (HVM), SSD Volume Type” . Remember to use alternate commands provided below in case you chose Ubuntu version 18.
Choose general purpose free tier t2 micro instance and skip the steps 4-5. Create a security group in step 6, as shown below.

SSH access is required only from your IP and hence select MyIP. We should allow HTTP and HTTPS access from anywhere.
As the last step, create a key pair “.PEM file (Privacy-Enhanced Mail)”, which will be downloaded and used in accessing the EC2. Launch instance by acknowledging you have access to the PEM file.
Accessing AWS EC2 instance
You can access the EC2 instance by SSH (Secure Shell Protocol) using the terminal in Mac and Powershell or command prompt in Windows 10.
We need the certificate file or PEM file to access the EC2 instance. Before using the PEM file, we need to make it read-only and accessible to only the file owner.
In Mac machines, run the following command in terminal ($ is the prompt in terminal).
$chmod 400 ../FlaskTest/MySite.pem
Please remember to change the path appropriately. For a Windows computer, you need to locate the PEM file in windows explorer and right click and change the security (some reference here). Alternatively, you can use PuTTY on a Windows machine to connect to the Linux server as explained here.
The command to access the EC2 is
$ssh -i “MySite.pem” ubuntu@<EC2 public IP>
Substitute <EC2 public IP> with the “Public IPv4 address” of the instance you launched in AWS. You will get a prompt similar to below
ubuntu@ip-172-31-30-17:$
Install the apache webserver and mod wsgi.
The next step is to install the Apache webserver and mod wsgi interface. Before installing these, get a list of existing packages and the list of the source.
$ sudo apt-get update
There will be a prompt for permission to use additional disk space. Answer Y for those Y/ N questions while installing packages.
To install apache webserver :
$ sudo apt-get install apache2
You can check the python version by running the following command
$python3 –version
For Ubuntu version 18 , use $python –version
To install mod-wsgi :
$ sudo apt-get install libapache2-mod-wsgi-py3
For Ubuntu 18, $sudo apt-get install libapache2-mod-wsgi
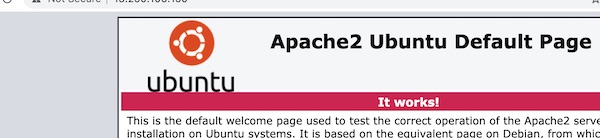
Testing: Check the apache installation by entering public IP in the browser’s address bar.
Installing Flask and creating the application folders
pip is the standard package-management system used to install software packages written in Python. For Python 3, pip3 is used.
Let us first install pip and then install Flask using pip.
$ sudo apt install python3-pip
$ sudo pip3 install flask
For Ubuntu 18, $ sudo apt-get install python-pip
$sudo pip install flask
Next step is to create a folder as the root folder and create a symbolic link (symlink) to default root folder of the web server i.e. /var/www/html
$mkdir /pythonapp
$sudo ln -sT /pythonapp /var/www/html/pythonapp
By default, Flask uses folder name ‘static’ to store static files such as CSS files and images. And ‘templates’ folder is used to store HTML files. Let us create those folders too.
$cd /pythonapp
$mkdir static
$mkdir templates
Let us create the base html file in the templates folder.
$cd /pythonapp/templates
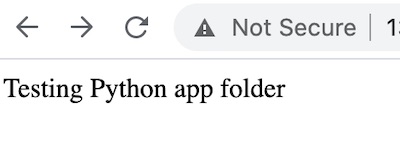
$echo “Testing Python app folder” > index.html
Testing : Type http://<your IP Number>/pythonapp/templates/ in browser address bar now. Output is displayed as below
Change the folder
$ cd /pythonapp
Creating and deploying Flask App
Now let us create a simple Flask Web app.
$sudo vi webapp.py
Copy and paste the below text to the editor
from flask import Flask,  render_template
app = Flask(__name__)
@app.route('/')
def home():
    return render_template("index.html")

@app.route('/page2')
def page2():
    return render_template("page2.html")

app.config['TEMPLATES_AUTO_RELOAD'] = True
Quick reference for vi editor commands to save
Click on Esc
Type :
The prompt moves to the bottom of the screen
Type wq and enter key
The file will be saved
Command to exit without save is :q!
The next step is to create a WSGI file. Put the following content in a file named pythonapp.wsgi:
$sudo vi pythonapp.wsgi
import sys
sys.path.insert(0, '/var/www/html/pythonapp')
from webapp import app as application
The next step is to edit the Apache configuration file so that dynamic HTML content is displayed
$sudo vi /etc/apache2/sites-enabled/000-default.conf
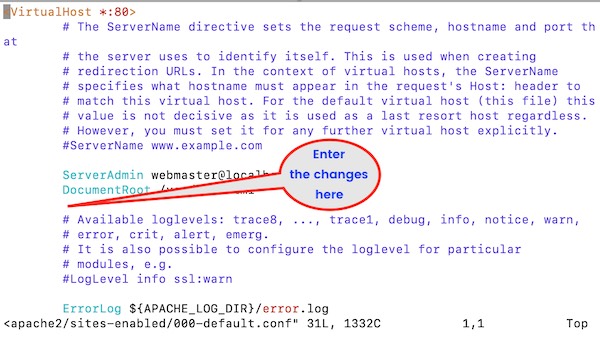
Copy text given here to space indicated in the picture.
WSGIDaemonProcess pythonapp threads=5
WSGIScriptAlias / /var/www/html/pythonapp/pythonapp.wsgi
<Directory pythonapp>
    WSGIProcessGroup pythonapp
    WSGIApplicationGroup %{GLOBAL}
    Order deny,allow
    Allow from all
</Directory>
The next step is to restart the web server using the below command.
$ sudo service apache2 restart
Editing index file and addling links
Now let us edit the index file and create another HTML page and create the link.
$ cd /pythonapp/templates
$sudo vi index.html
Replace the content in index.html with the following lines
<!DOCTYPE html>
<html lang="en">
<head>
<title>My Web page - Learning HTML made easier </title>
<link rel="stylesheet" href="/static/css/main.css">
</head>
<body>
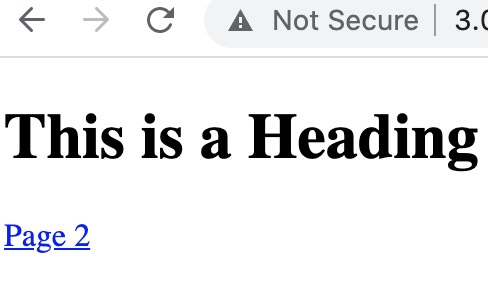
<h1>This is a Heading</h1>
<a href="{{ url_for('page2') }}">Page 2</a>
</body>
</html>
The last step is to create the second HTML page
Testing: Input the IP number in the browser address bar to display the below screen.
Click on the Page 2 link, and the page is displayed
Checking for any errors
You can use the below command to check the error log if something goes wrong.
$ vi /var/log/apache2/error.log
Comment below your suggestions and questions about deploying Flask on AWS.
When I view the website url after creating the Testing Python index file. I get a 403 error saying my access is forbidden. Any idea why or possible solutions?
Hi Harold, Please check if you have provided the details while creating the security group in AWS.